How to configure Quick File Manager module?
After you click "Dashboard", you will enter following interface.
There are four tabs included, we will explain them one by one.
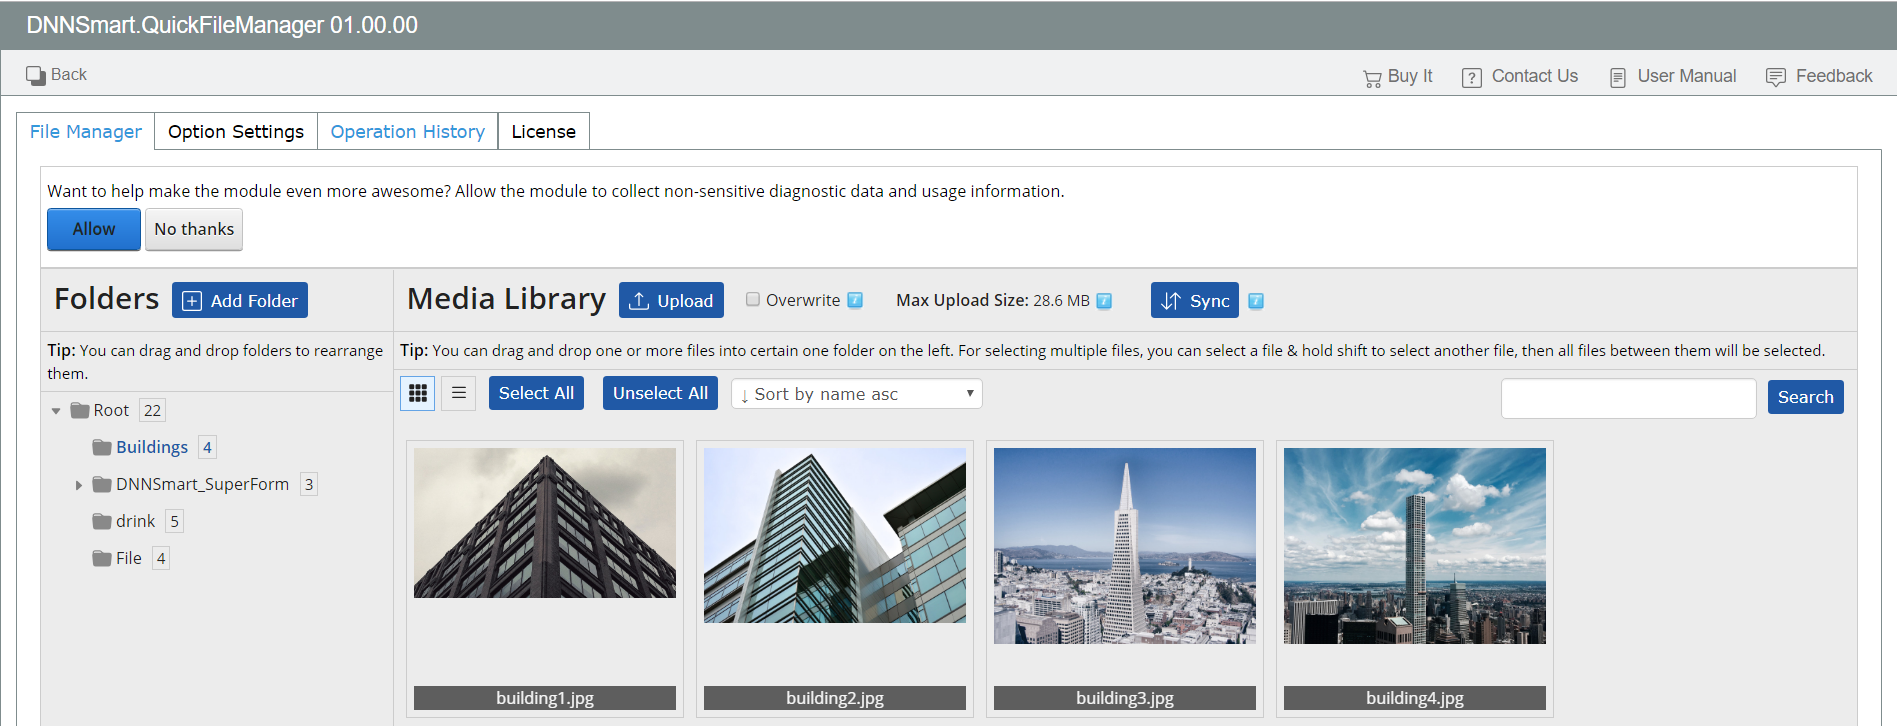
File Manager
On this page, you can manage your folders and files quickly. This section is divided into two parts, they are folders and media library.
Folders
In this section, you can manage folders.
How to add folders?
1.Please put your mouse next to a folder, and then right-click.
2, Please input folder name in the pop-up box and choose folder type from the dropdown.
Regarding the difference between standard type and secure type, please refer to the following article.
http://www.dnnsmart.net/Support/Articles/tabid/222/ContentId/40/language/en-US/The-difference-between-standard-type-and-secure-type.aspx
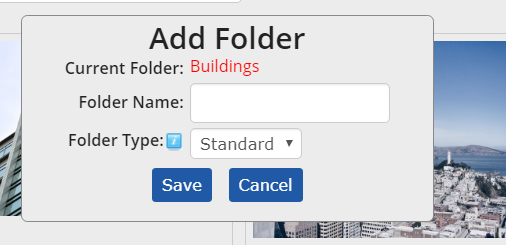
3, Please click "Save" button.
4, Folder is added successfully and it will be a subfolder of that folder.
How to drag and drop folders to arrange them?
You can drag main folders to make them become sub folders or make sub folders become main folders. Just drag and drop folders to arrange them as you want.
Please see animation below.

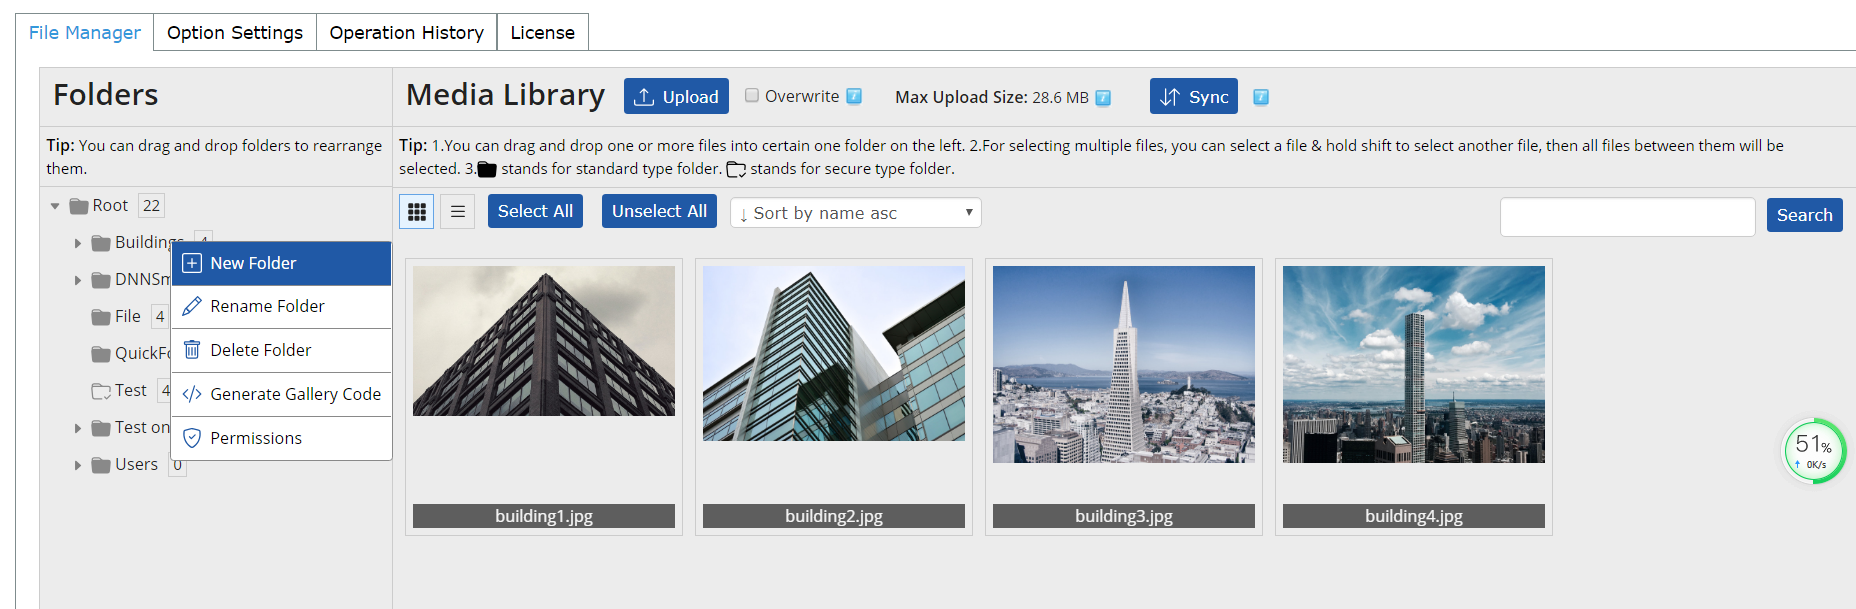
Right-click features
You can right-click any folder, see below.
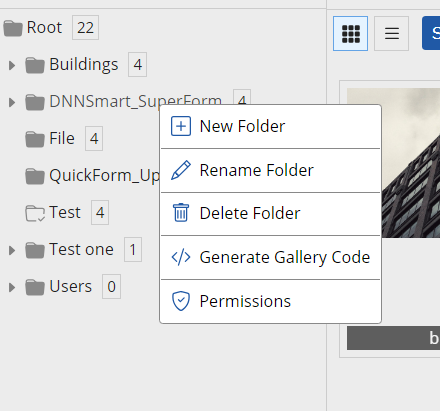
1, New Folder: You can click this button and add a new folder which will be a sub folder of current folder.
2, Rename Folder: You can click this button to rename current folder.
3, Copy Folder: You can click this button to copy current folder.
4, Delete Folder: You can click this button to delete current folder.
5, Generate Gallery Code
First, please click this button and a window will pop up.
Secondly, please click “Copy Code” in the window as below.
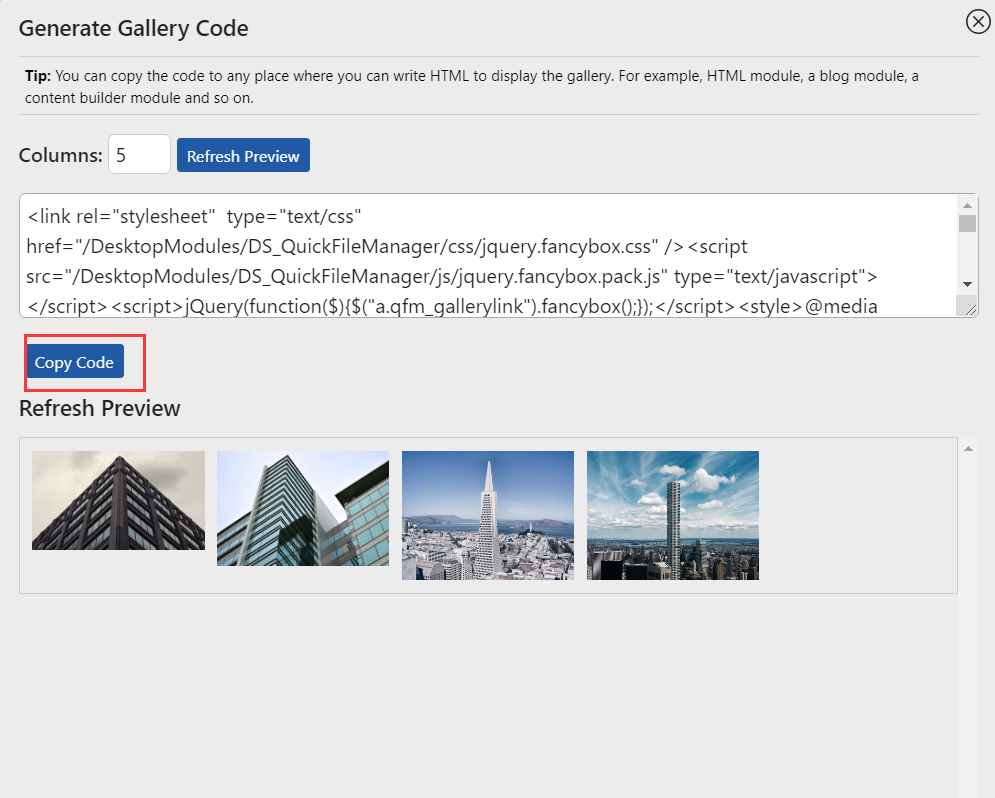
Lastly, please copy the code to any place where you can write HTML to display the gallery. For example, HTML module, a blog module, a content builder module and so on.
6. Permissions: Please go to following page and read this article, then you will see.
http://www.dnnsmart.net/Support/Articles/tabid/222/ContentId/41/language/en-US/Introduction-on-permision-in-Quick-File-Manager-module.aspx
Media Library
In this section, you can manage files such as uploading new files, deleting files, moving files and so on.
Two Kinds Of Display Modes
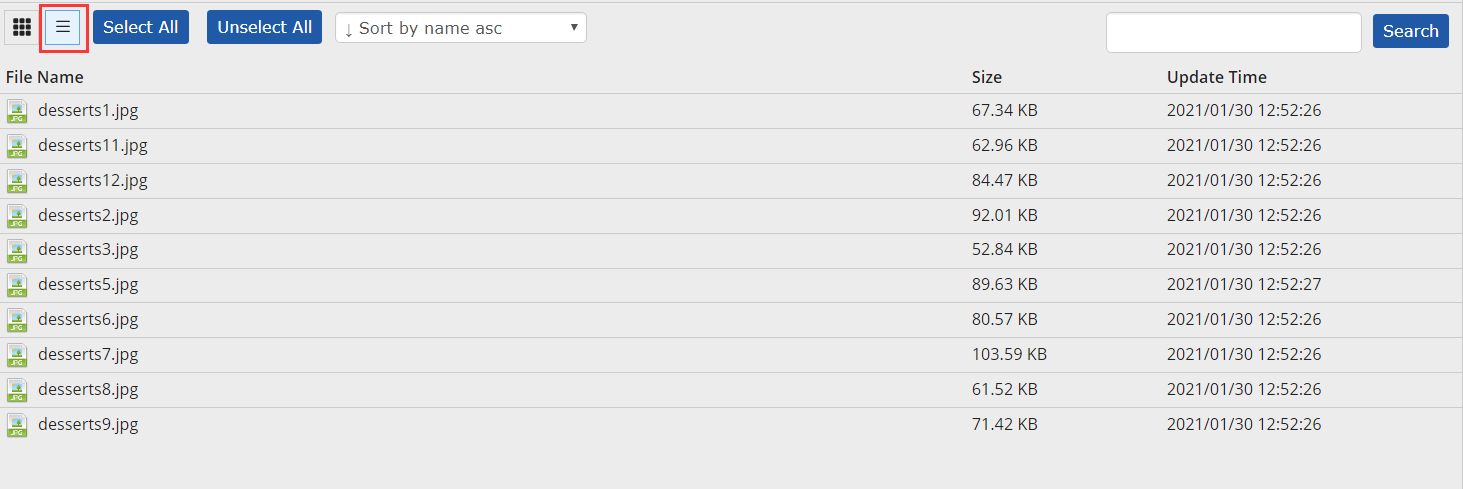
In list mode, you can view file name, file size and update time in a list.
Please click the button marked in red box below, then it will display in list mode.
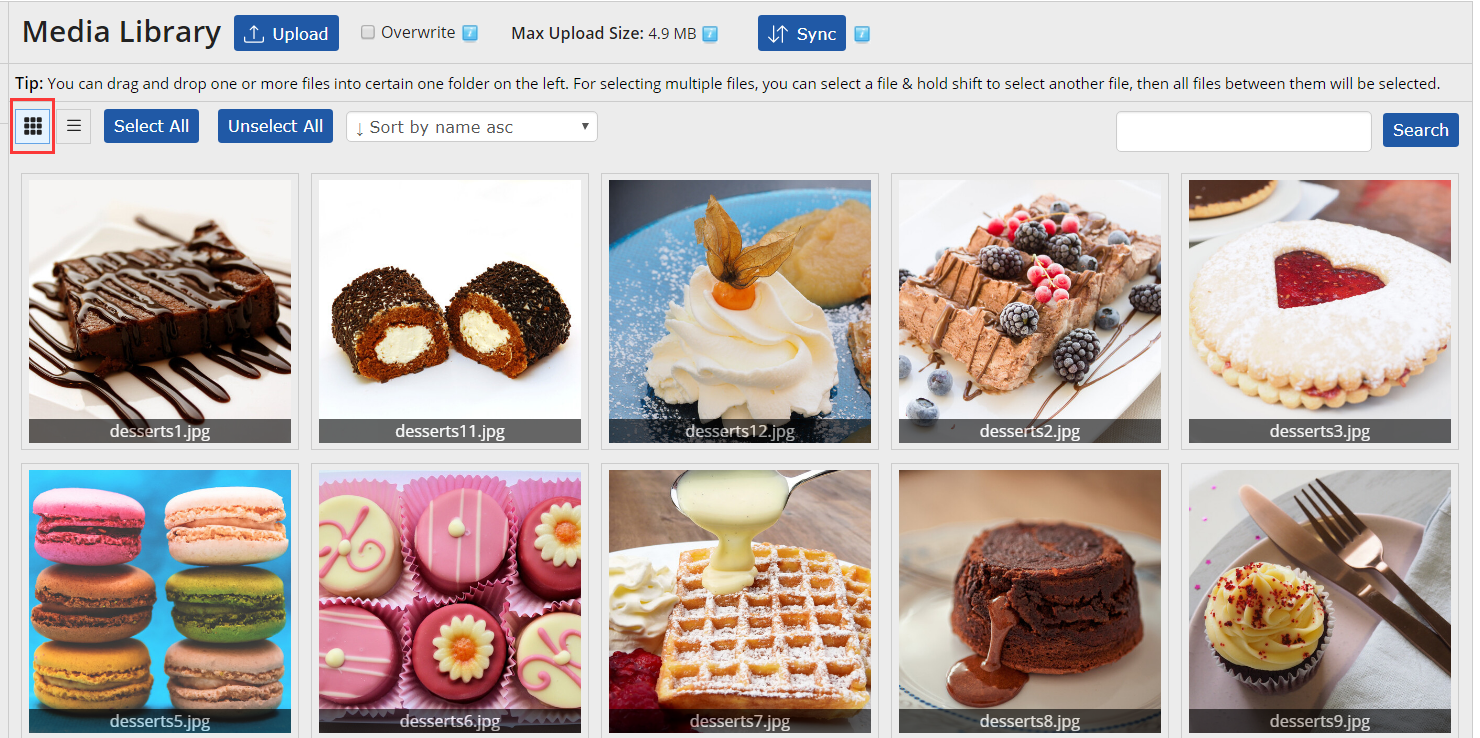
In grid mode, you can preview files and this feature is especially important for uploaded images. Without clicking each image one by one, you can preview all of them at one time.
Please click the button marked in red box below, then it will display in grid mode.
How to upload files?
1, Please click Upload button as below.

2, It will appear one file selection box and you can choose file(s) from your computer.
PS: You can press shift and choose multiple files at one time.
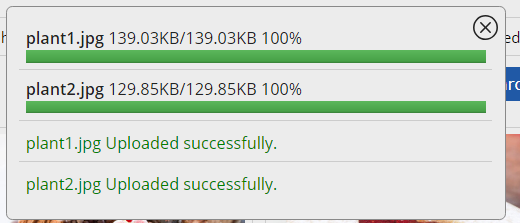
3, There’s progress bar to show, see below.
4, There are three buttons on the right of Upload, we will explain them as below.

Overwrite: If checked, you are allowed to upload files with the same name. If unchecked, you couldn’t upload files with the same name.
Max Upload Size: It’s the maximum size of the file allowed to upload. If needed, you can modify it in web.config file.
Sync: After clicking synchronize, the module will synchronize your current folder and files to DNN’s file database.
How to move file(s) from this folder to another folder?
1, Please open one folder and choose one file, then drag it.
For selecting multiple files, you can select a file & hold shift to select another file, then all files between them will be selected.
2, Please drop the file into the folder where you need.
Please refer to the animation below, it will be clear to explain.

How to sort files?
There’s a dropdown box for sorting, see below.

You can choose one sorting rule according to your need, files can sort according to name, update time and size. Files can be arranged in ascending or descending order.
How to search files?
There’s one search box on the right corner, see below.
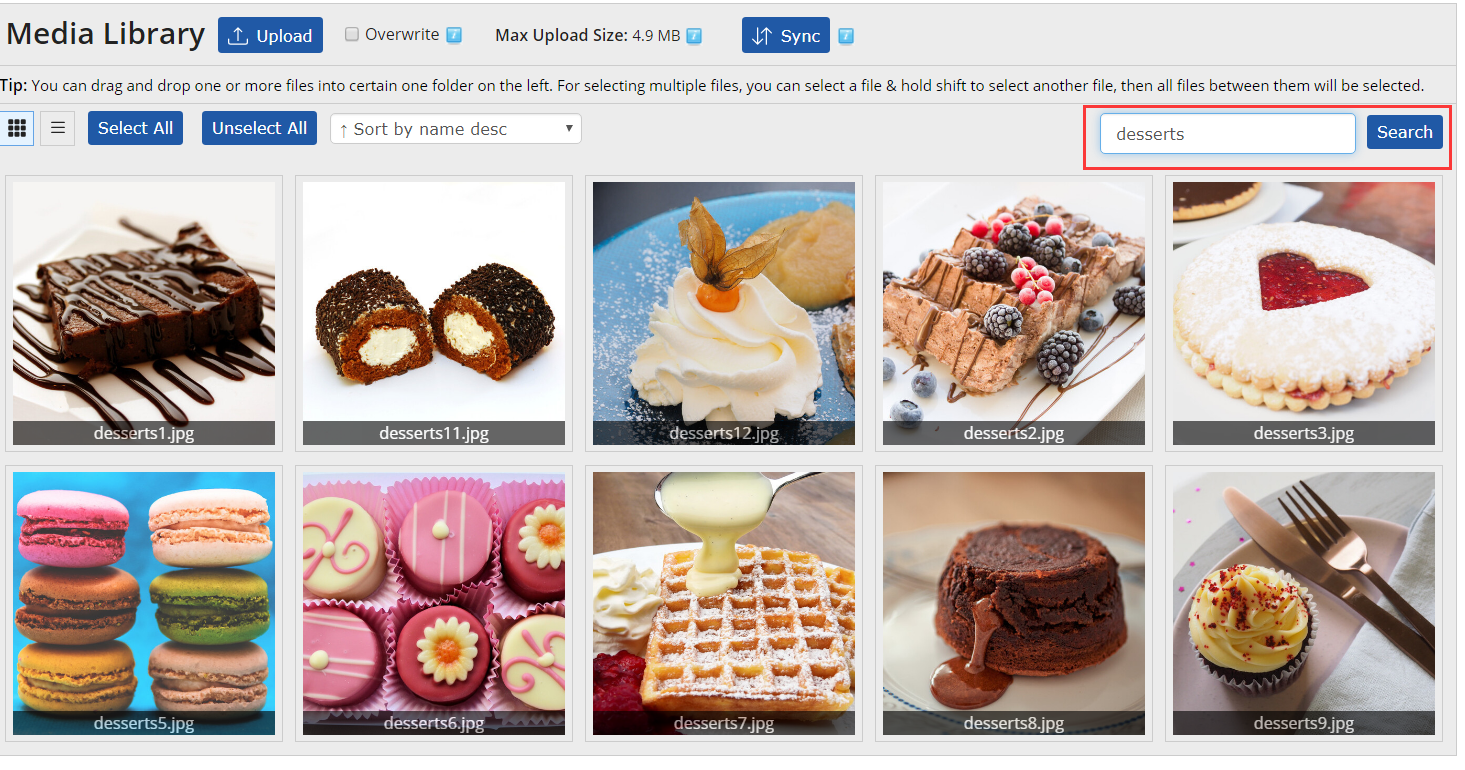
You can input your keyword and click “Search” button.
Then matched results will display on the interface.
Select & Unselect feature

Please see two buttons above.
After checking “Select All” button, all files will be deleted. Then you can drag &drop all these files or delete all of them at one time.
Right-click features
You can right-click any file, see below.
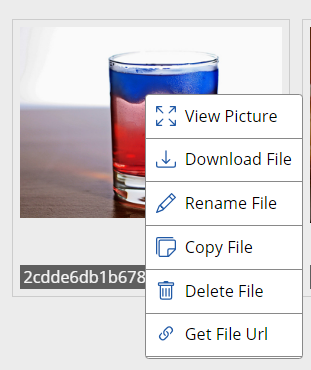
1, View Picture: After you check this option, it will pop out one window and display the larger image in lightbox.
2, Download File: After you check this option, it will dowmload this file.
3, Rename File: After you check this option, you can rename this file.
4, Copy File: After you check this option, you can copy this file.
5, Delete File: After you check this option, you can delete this file.
5, Get File Url: After you check this option, you can get URL of this file.
Option Settings
On this page, you can do some basic settings for this module.
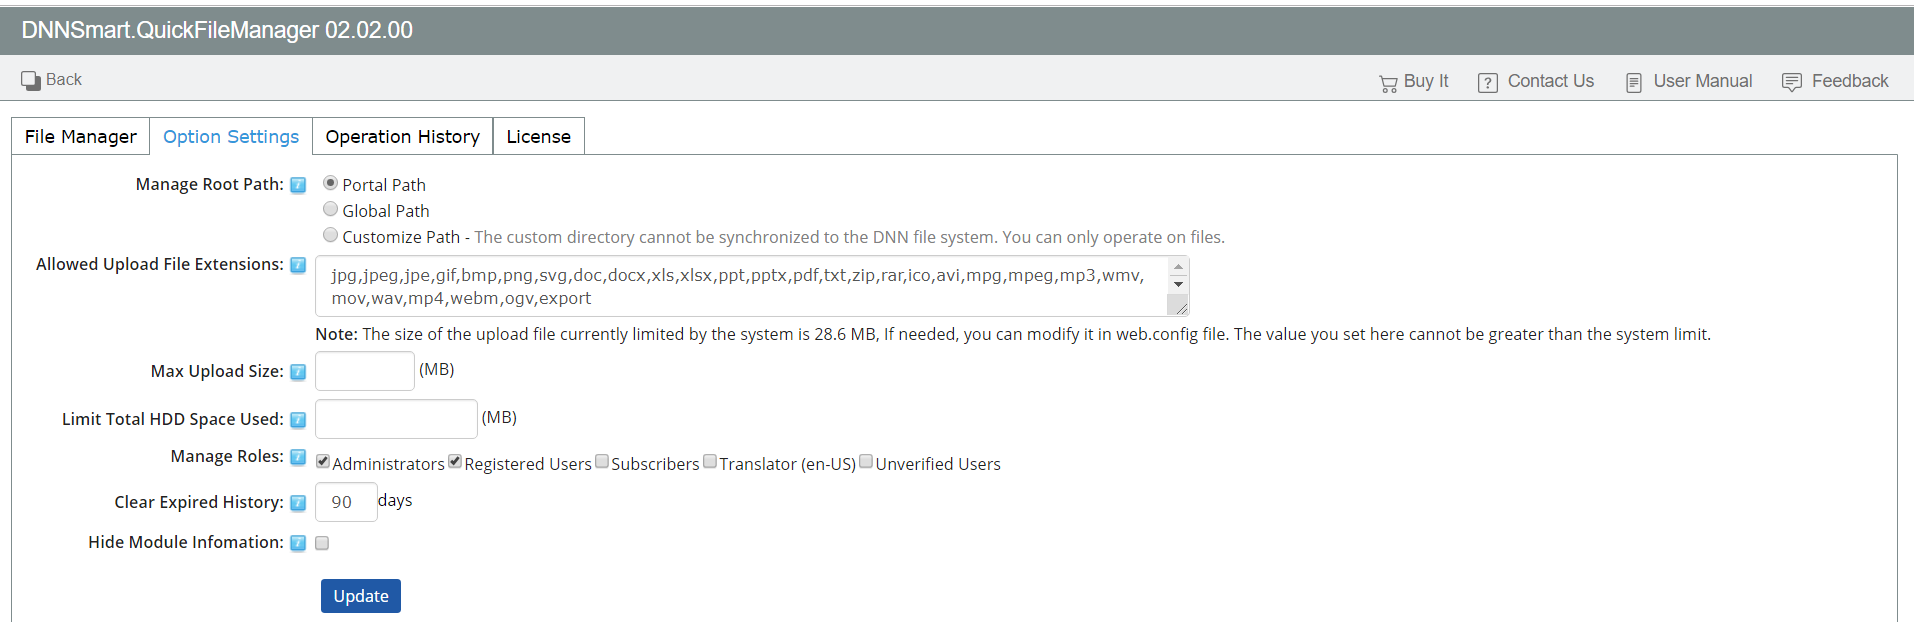
Manage Root Path: You can configure the root directory displayed on the front-end. There are three options for you, portal path, Global path and Customize Path.
Allowed Upload File Extensions: It is a comma separated list of file extensions that end users are allowed to upload to the site. Uploading some special types of files will be prohibited by DNN (. HTML,. ASPX and so on). Although the files can be uploaded successfully, these files will not be synchronized to the DNN database. Please note this.
Max Upload Size: It's the maximum size of files allowed to be uploaded. If left blank, there’s no limit.
Limit Total HDD Space Used: You can limit the total size of all files in root. You can see the usage of the total space on the front-end. If left blank, there's no limit.
Manage Roles: You can configure which roles can manage files.
Clear Expired History: You can configure it automatically clears all operation history before how many days. Filling in zero means it won't clear automatically.
Hide Module Infomation: If checking this option, module name in the top left corner and Buy It, Contact Us as well as other links in the top right corner won't display.