Configure API Builder module.
How to add API Key?
1, After you add DNNSmart.API Builder module on a page, please click “Dashboard” to enter module back-end.
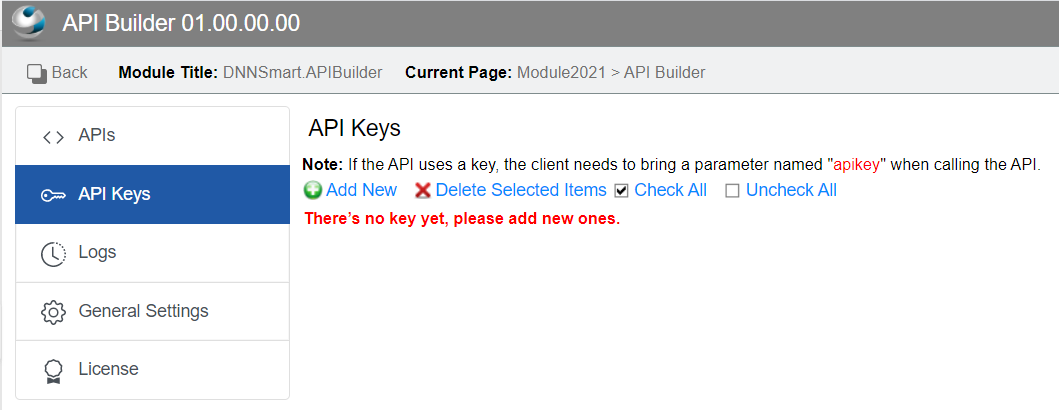
When you first enter back-end, you will go to the interface where you can manage API Key.
If your API needs API Key to improve security, you can add them here.
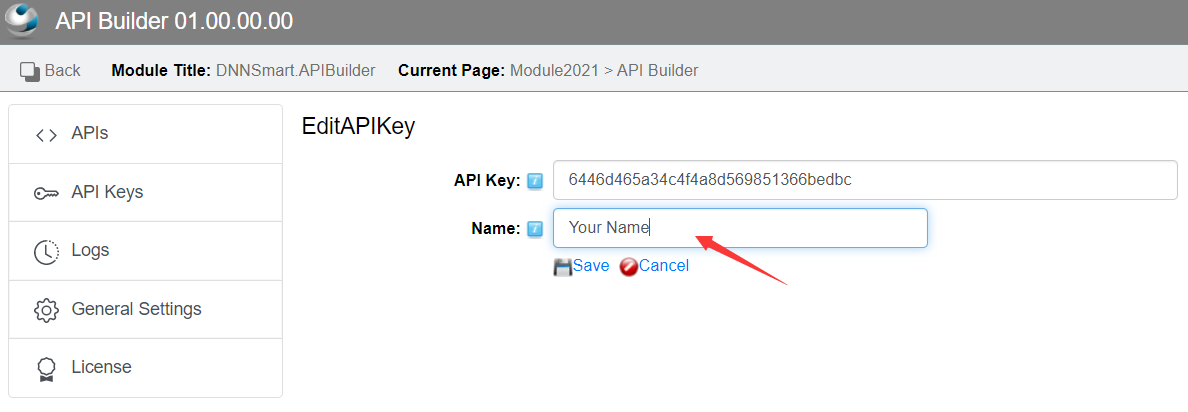
2, Please click “Add New” button and enter following page. In default, it will automatically generate one API Key. And you only need to fill in one name for this Key, which is easy for you to identify it.
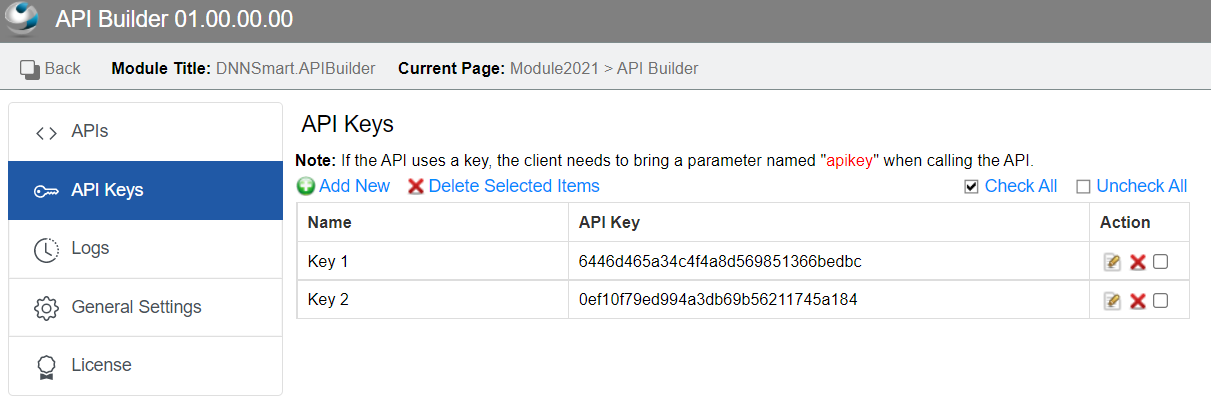
3, After you finish adding keys, you will see them on the list page.
How to add API?
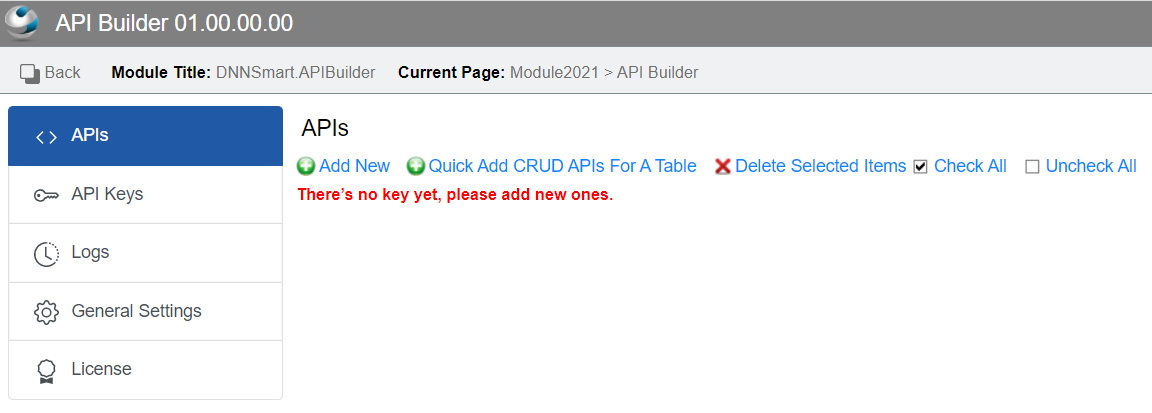
1, We can click “APIs” tab and enter API list page. On this page, you can click “Add New” button to add a single API and you can also quickly add five crud APIs to a data table.
2, Firstly, we will give some guides on adding a single API.
Please click “Add New” button and enter Edit API page as below.
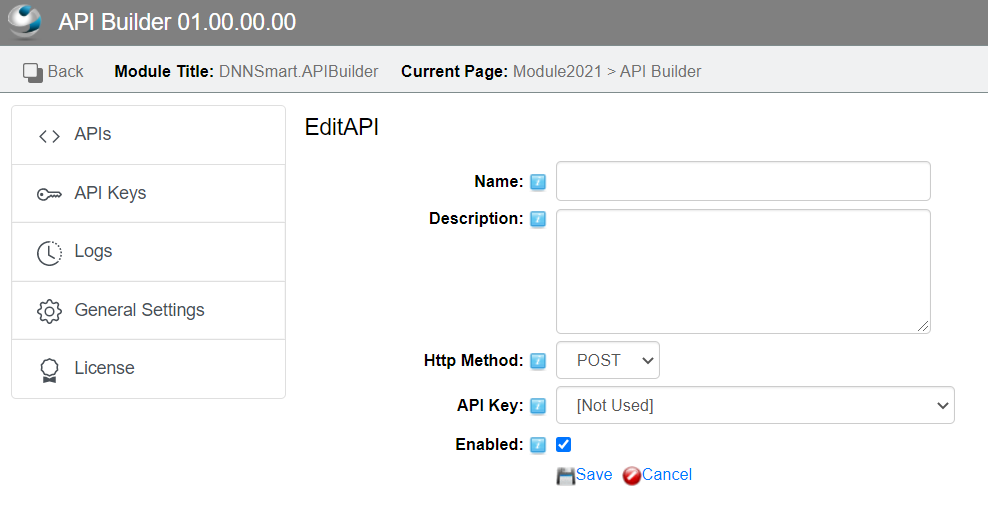
Please see our clarifications on each option as below.
Name: It’s the name of the API, which cannot have spaces.
Description: It’s the description of the API, which can facilitate you to quickly understand the action of API later.
Http Method: It’s the API request method. Currently, DNN only supports POST and GET.
API Key: You can select the previously added key here, or you can not use it.
Enabled: You can control whether the API is available through this option.
3, After clicking Save, it will appear following fields.
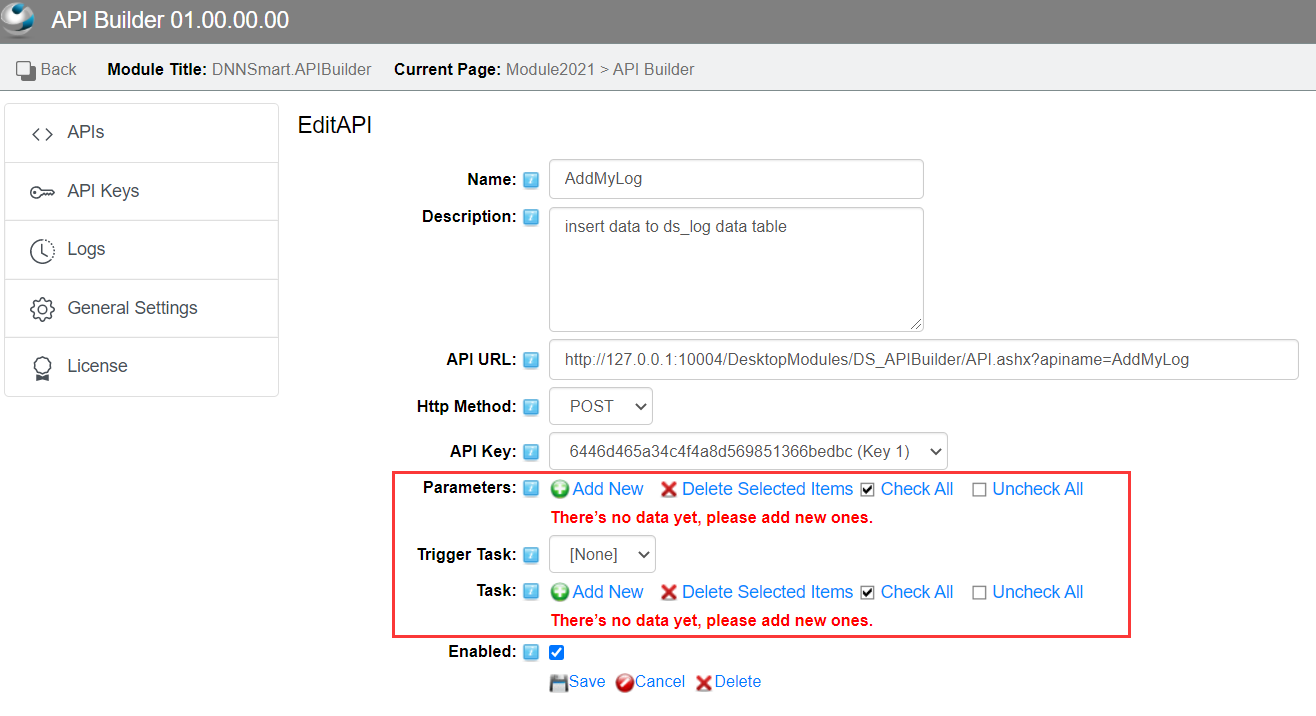
Parameters: You can add the parameters required by the API here.
Task: You can add some tasks here.
Trigger Task: After adding tasks, you can choose which task this API will execute here.
How to add parameters?
1, On Edit API page, there’s one “Add New” button included in “Parameter” field. See below.
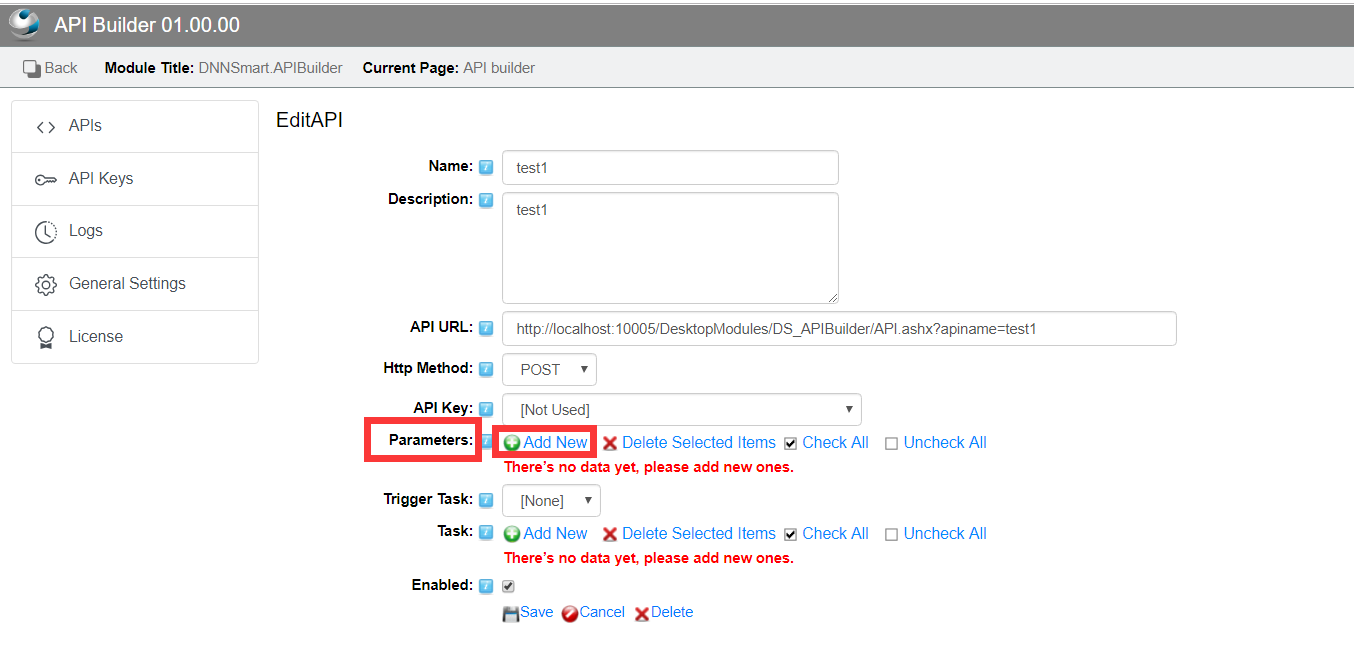
After you click this “Add New” button, you will enter following interface.
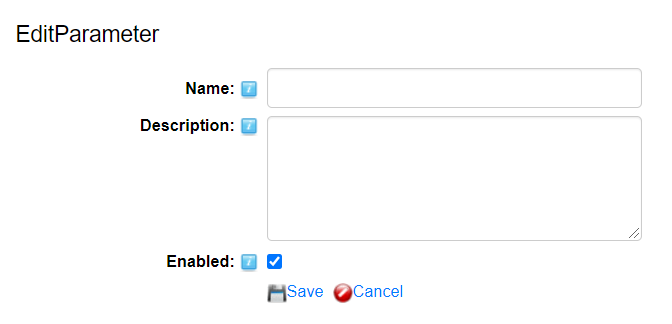
Name: It’s the name of this parameter, which can’t have spaces.
Description: It’s the description of this parameter, which can help you identify the parameter.
Enabled: Whether to enable this parameter.
2, After clicking “Save” button, we will see some parameters we added.

How to add task?
1, After clicking “Add New” button in “Task” option of Edit API page, you will see following interface.
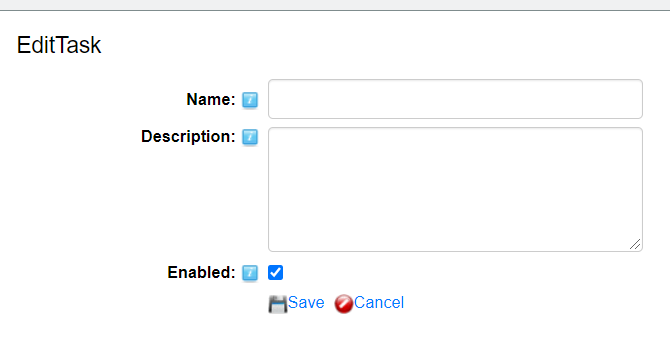
Name: It’s the name of the task, which cannot have spaces.
Description: It’s the description of this task, which can help you identify the task.
Enabled: Whether to enable this task.
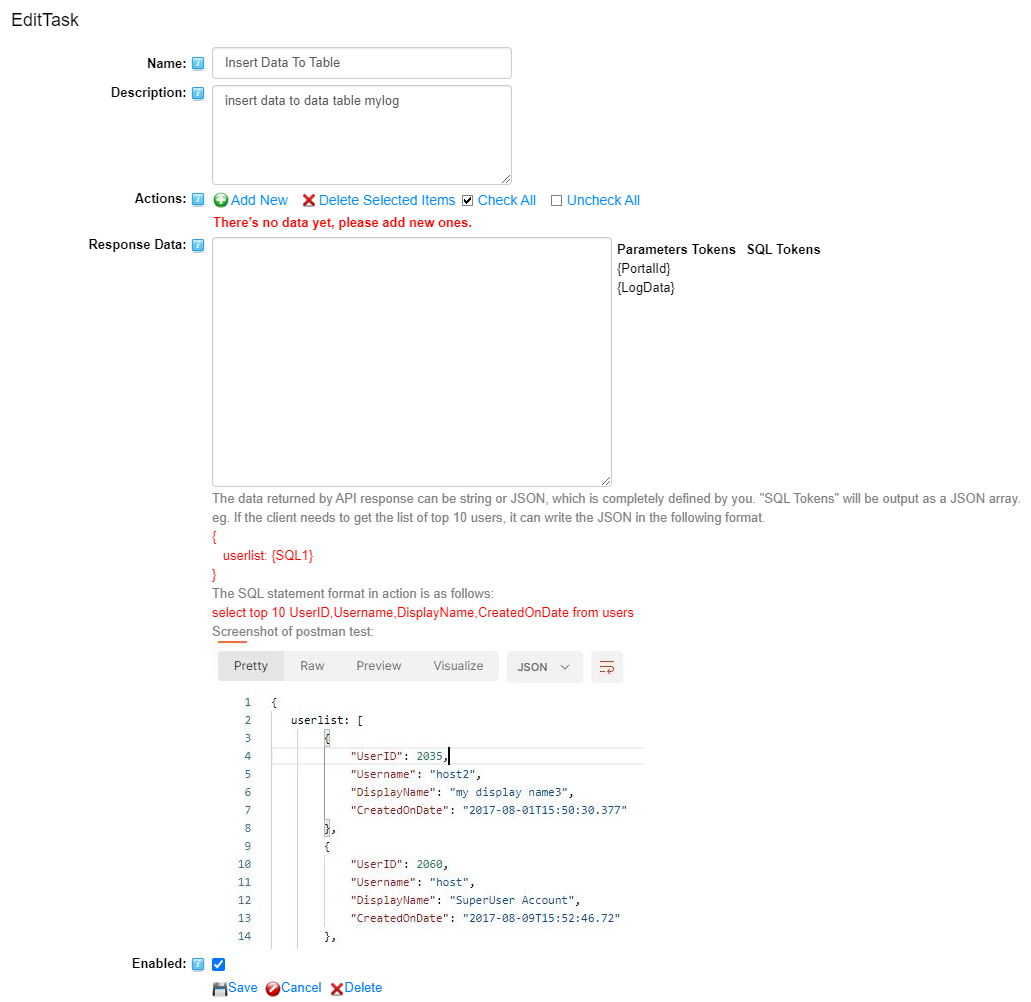
2, After clicking the Save button, you will see more options. Here is the explanation.
Actions: You can add multiple actions for this task, and they are executed in order.
Response Data: Here you can define the return data of the interface. If you want to return multiple data of a table in the database, you need to define a JSON format and use SQL tokens.
How to add actions?
1, After clicking “Add New” button in “Actions” option of Edit Task page, you will get following interface.
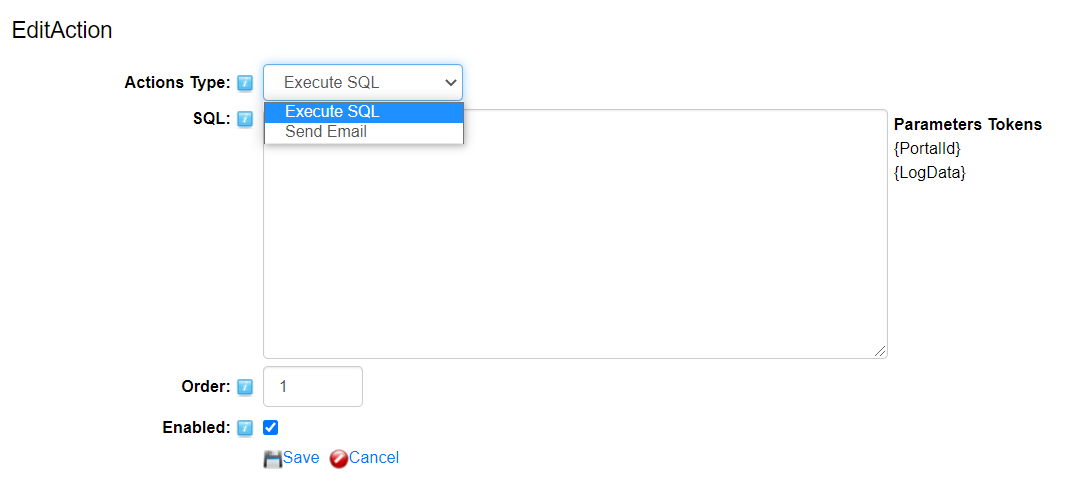
Action Type: It’s the action type. Currently, SQL execution and email sending are supported. More types will be added in later versions.
Order: It's the execution order of actions, you can manually drag and drop to sort on Edit Task page.
Enabled: Whether to enable this Action.
Execute SQL Type:
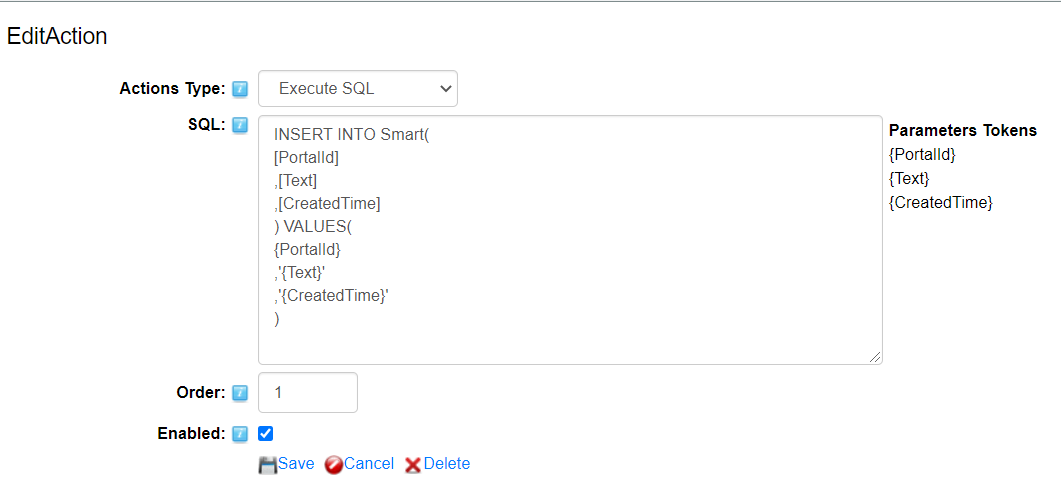
SQL: You can input an SQL statement to insert, update, delete or obtain data. You can use parameters tokens to decide how to execute data.
Send Email Type:
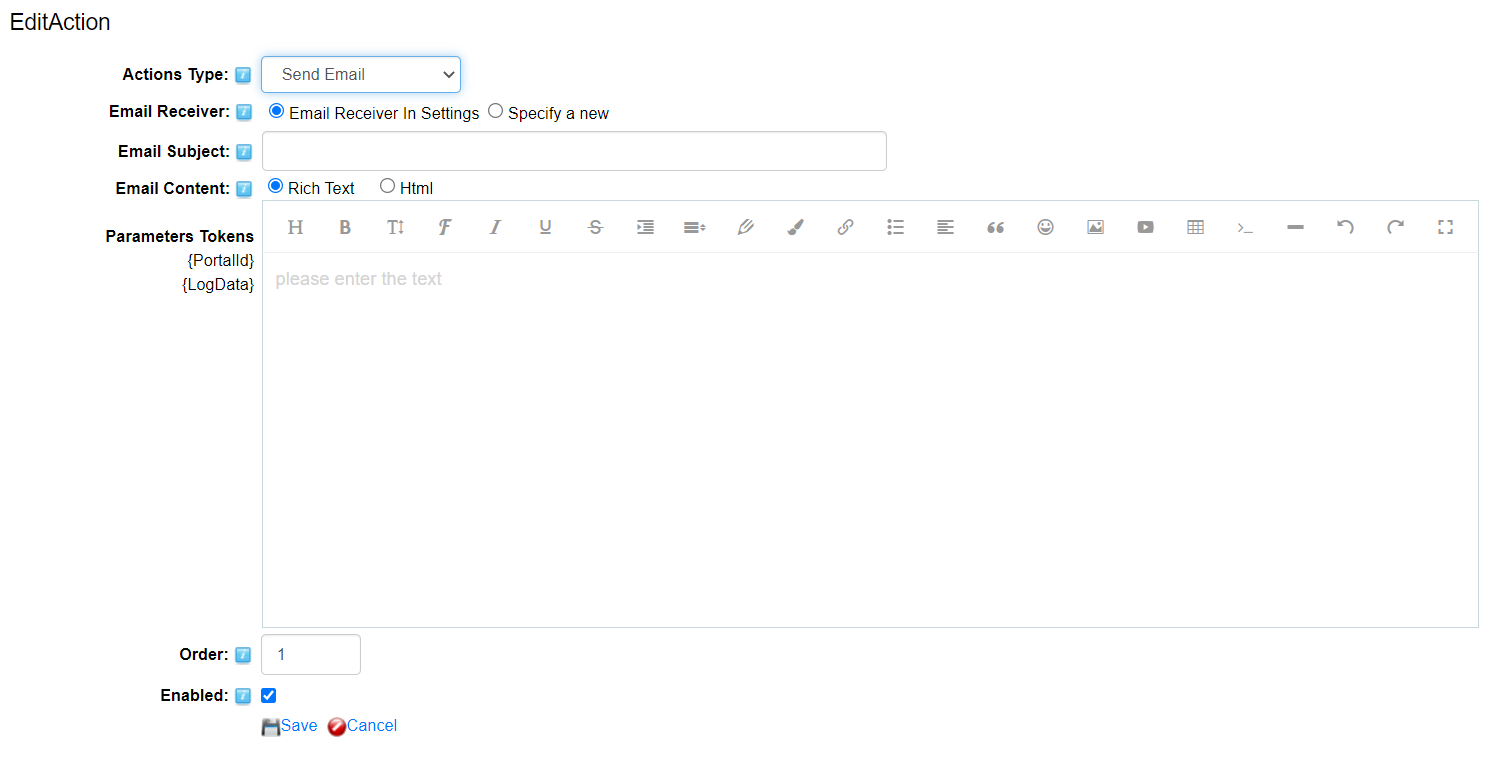
Email Receiver: You can set the mail recipient, whether to use the mail recipient on the General Settings page or define a new one.
New Email Receiver: You can custom mail recipients.
Email Subject: It’s the subject of the email.
Email Content: It’s the email content, you can use parameter tokens here.
How to use “Quick Add CRUD APIs For A Table” function?
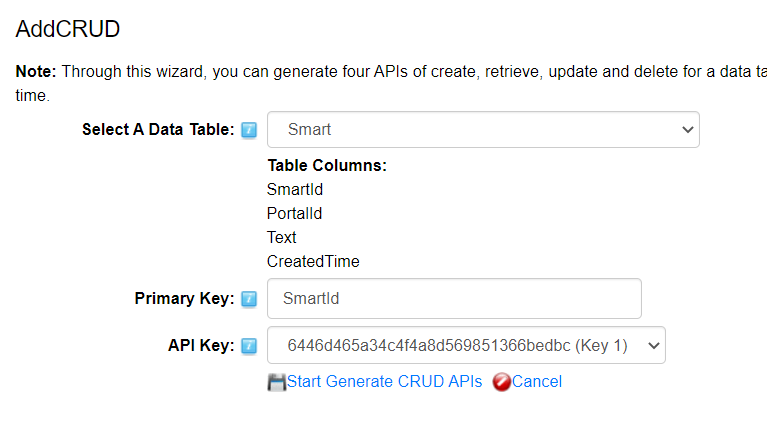
1, With this function, you can quickly add 5 APIs to a data table. After clicking "quick add crud APIs for a table", you will enter following interface.

Select A Data Table: Select which data table to create APIs for.
Primary Key: It’s the primary key of this table, which can let the program know & operate the data according to which indentifier.
API Key: Specify an API key for APIs or do not use it.
2, After selection, it will show as below.
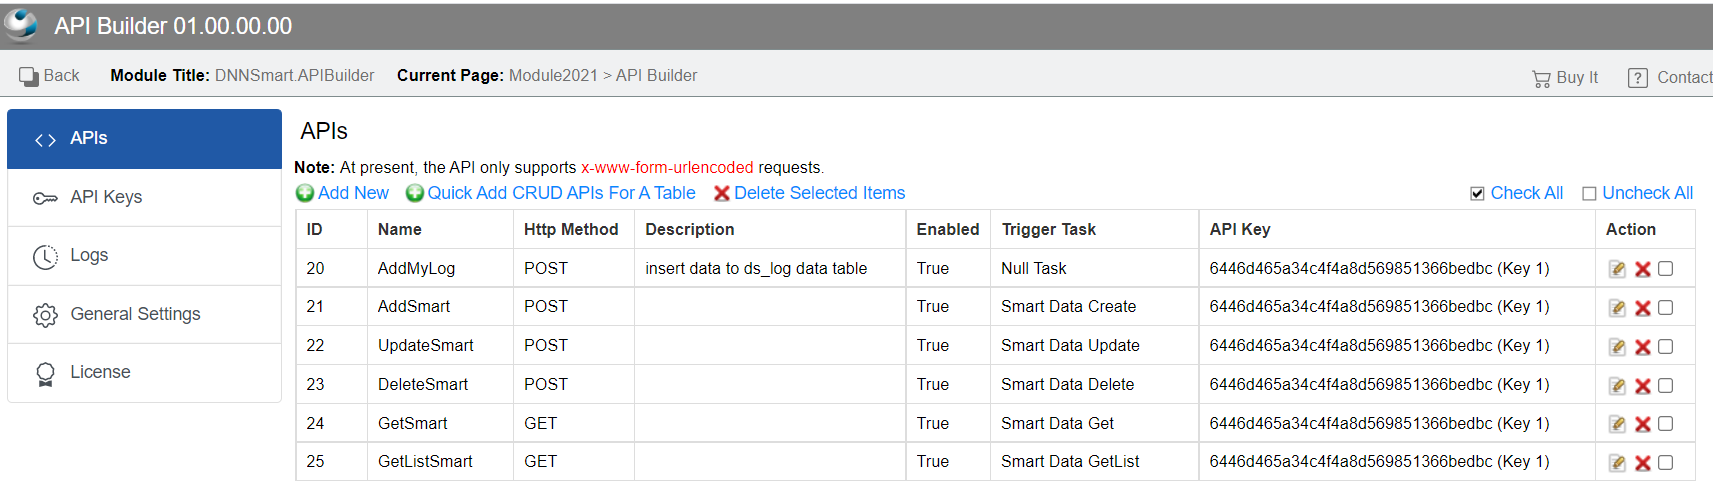
3, After clicking the "Start Generate CRUD APIs" button, five APIs will be generated. Please see screenshot as below.
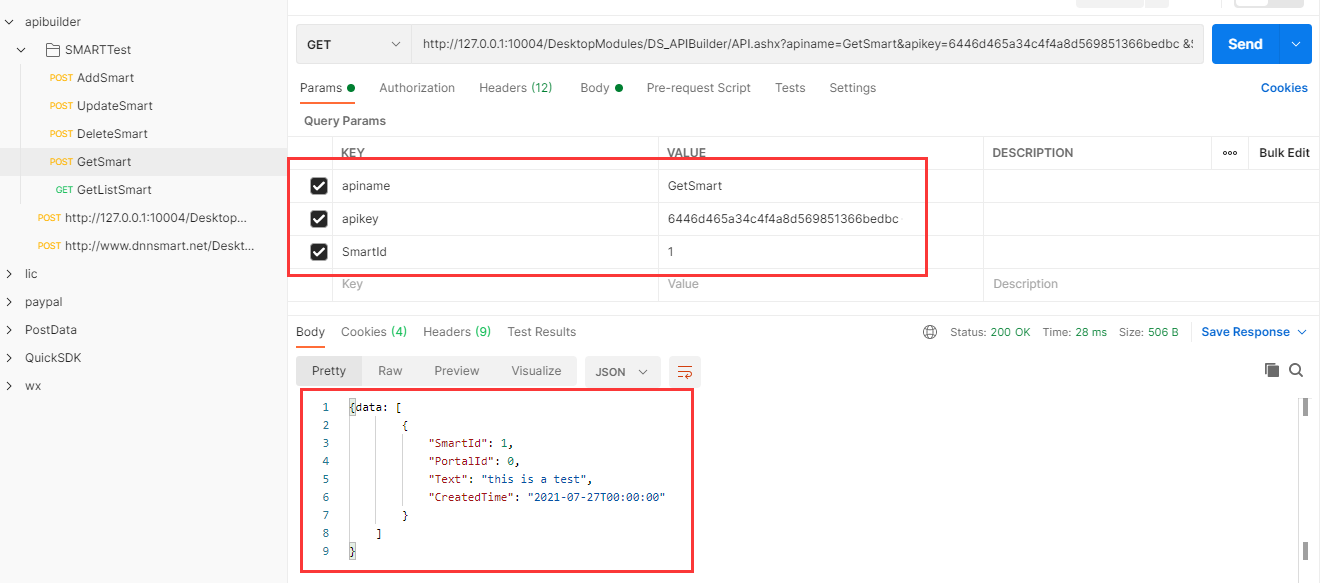
4, Use post man and other tools to test, and everything works well.
General Settings
On this interface, you can see following options.

Email Receiver: It’s the mail recipient of Send Email Action. If you want to send to multiple recipients, please separate them with semicolons.
Email Sender: It’s the email sender.
Cross Domain Policy: You can control the permissions of the interface here. You can set whether the interface is completely public or only allow some domain names to request the interface.
API Key Position: You can set whether the API key is placed in the request header or the request body. Of course, it is a normal practice to put it in the request header.
Limit Seconds And Limit Times: You can use these two options to limit the number of requests that the same IP can request in how many seconds, so as to prevent malicious requests from causing the server to crash.
Clear Expired Logs: You can set how long logs will be kept. If it is set to 0, it will never be cleared. If you set it to 30, the logs before 30 days will be automatically cleared.